

Winterizing Your Plumbing System
The transitioning periods from autumn to winter can bring about many changes, one of which includes preparing your home to deal with plummeting temperatures. Among the numerous aspects to bear in mind, ensuring your plumbing system can withstand winter’s chill is of paramount importance. By comprehensively winterizing your plumbing, you can prevent the damage and repairs that can follow frozen pipes. The key to achieving this involves learning to drain your water system, insulating your pipes, and sealing off vulnerable openings that could let in cold air. The objective of this discourse is to empower homeowners with useful knowledge about these elements, enabling them to safeguard their property throughout the frosty season.

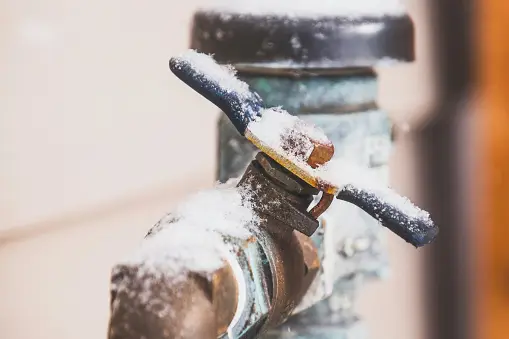
Draining the Water System
Prevent Freezing Pipes: A Comprehensive Guide to Proper Water Drainage
Here’s a business truth you might not expect: Entrepreneurship crosses a broad range of industries, extending even into the realm of home maintenance. Consider this example: an entrepreneur may need to winterize their facility, office space, or home to maintain a productive environment. One crucial task in this winterization process is preventing water pipes from freezing, which could lead to devastating damages and unexpected costs.
Any business owner will tell you, prevention is better than cure. Freezing pipes can be costly and inconvenient. Not only can the water in these pipes freeze, but they can also expand, causing the pipes to burst. This issue brings a host of problems, from property damages to high repair costs. Consequently, a routine regime of water drainage can be seen as a valuable investment.
So, how should this be done?
Step 1: Prepare Your Tools and Identify Your Pipes
First, equip yourself with adjustable wrenches and air compressors. Next, familiarize yourself with the plumbing system layout of your building. Identify all the water supply lines, especially those that are in unheated areas, such as basements, crawl spaces, and exterior walls.
Step 2: Shut Off Your Main Water Supply
To prevent water from freezing within your pipes, shut off the main water supply. Additionally, it’s prudent to turn off the water pump and water heater to protect these devices during the procedure.
Step 3: Open Your Faucets
Open all indoor and outdoor faucets in your building. By doing this, you ensure that the water within your pipes has an outlet when the air pressure is applied. Remember to also flush all the toilets in your building.
Step 4: Drain Your Pipes
Now, proceed to apply air pressure to your pipes using an air compressor. By doing this, you push any remaining water out. To do this, connect your air compressor to the main drain valve and regulate the pressure to around 50 psi. It’s crucial not to exceed this pressure level to prevent pipe damage.
Step 5: Antifreeze for Extra Protection
For additional protection, especially in buildings in extremely cold regions, consider using non-toxic antifreeze. This substance should only be used in your drains and toilets.
So there you have it, a simple, preventative measure carried out with relative ease that could save your business a world of trouble. Just like smart entrepreneurial moves in the business world, understanding and implementing such preventative steps keeps things running smoothly and efficiently, securing your bottom line.

Insulating your Pipes
Fully optimized pipe insulation not only prevents freezing but also significantly reduces energy consumption, ultimately augmenting the operational efficiency of your systems while providing the added benefit of reducing energy costs. Choosing the right insulating material and effectively applying it to your pipes is of paramount importance.
There are a multitude of insulating materials on the market, each ideally suited to varying operational conditions and offering an array of thermal resistance properties. Two common types are foam and fiberglass insulation.
Foam insulation is ideal for areas with mild to moderate climate, and it’s typically most efficient for indoor usage. Flexible foam, typically sold in tubes, is remarkably simple to install. It merely slips onto the pipes, making it a favored choice for many.
Fiberglass insulation, on the other hand, is better suited for extremely cold climates and outdoor settings. It showcases superior thermal resistance and is known for being more durable. Since fiberglass insulation comes in wrap form, it can be a more labor-intensive installation process compared to foam insulation.
Before getting into the process of applying insulation, ensure you have measured the diameter of your pipes to select the correct size of insulation. Additionally, preparing the area of application by cleaning off any dirt, corrosion, or moisture on the pipe surface will ensure an enhanced fitting of the insulation.
To install foam insulation, carefully cut the foam sleeves along their length to match your pipe size. Open them up and place them onto the pipes, making sure they align perfectly. Use duct tape to secure the foam, ensuring it’s tightly fitted without any gaps.
The process of applying fiberglass insulation is slightly more complex. Start by measuring and cutting the insulation to match the length of your pipes. Wrap the insulation snugly around the pipe, securing it with a high-quality adhesive or, for an even sturdier fit, wire. After applying, it’s important to further secure the fiberglass wrap with a weather-resistant material if your pipes are exposed to outdoor elements.
In conclusion, applying the correct insulating materials to your pipes is a proactive approach to mitigating potential losses to your system’s efficiency and overall operational costs. While there are various insulating materials available, selecting the right one for your specific needs, paired with the appropriate application method, will significantly augment your system’s performance all while conservely contributing to a reduced energy expenditure.
Sealing Off Vents and Other Openings
While it’s certainly vital to insulate and winterize your pipes against freezing temperatures, it’s a small picture of a bigger canvas.
The full winterization task extends further, to our vents and other openings such as windows, doors, or any other crevices in the structure.
That’s where the next level of your home winterizing campaign commences, effectively sealing off vents and other openings.
The rationale behind sealing off vents and other openings is predominantly thermal.
Winterization helps to minimize drafts, decrease heat loss, and thereby improve household energy efficiency.
Resultantly, your heating system will no longer work overtime, saving significantly on energy costs and promoting overall sustainability in energy usage.
Your initial port of call should be the foundation and flooring.
Areas such as crawl spaces, cellars, or basements often have ventilations that are great for cooling in the warmer times but during winter act as a chilly air conduit.
Block these vents with custom-cut thick board insulation affixed with duct tape for temp control.
A caveat here – active ventilation systems (for instance forced-air HVAC systems) play a significant role in maintaining indoor air quality and they should not be closed off.
Therefore, the process of sealing vents should be performed with utmost prudence, without compromising on the overall air quality of the indoors.
From there, move up to your windows and doors.
Window film insulation kits are a cost-effective and invisible fix.
They trap a layer of insulating air between the film and the window pane, barring cold air from seeping in through gaps.
For doors, weatherstripping is your best bet.
Door sweeps are also excellent for sealing gaps at the bottom of your doors.
Likewise, pay heed to chimneys and fireplaces.
A significant amount of heat can leak out through an open fireplace.
Using a chimney balloon to block the flue when it’s not in use can stave off such losses.
However, never forget to remove it before lighting a fire.
Finally, much like the high importance we place on properly insulating water pipes for efficiency and protection, the same principle applies to ventilation ducts.
Properly insulated and sealed ducts prevent heat loss as the warm air travels from your central heating system to the rooms of your house.
Remember to pay attention to duct joints and aim for a total sealing for maximum efficiency.
Let’s not forget the classiness of creative innovation.
An interdisciplinary insight is often a game-changer.
Reach out to the members of your professional network—they can provide tips and innovative solutions based on their own experiences across different industries.
Perhaps some eco-friendly solutions from renewable energy circles or efficient seals from a peer in the construction industry will mark a difference.
In conclusion, your mission to effectively seal the vents and other openings in your home for winter is about additional heat retention, freezing prevention, and ultimately energy efficiency.
It’s a testament to using strategic planning, proper tools and materials, and tactical execution for a warm, cozy winter.
More so, it’s an anthem about sustainability, making the most of our resources for a better, more comfortable, and efficient environment.
Conclusion
Undoubtedly, the metaphorical ounce of prevention is far superior to the proverbial pound of cure, especially when it comes to plumbing in winter. By skillfully draining your plumbing system, carefully insulating your pipes, and meticulously sealing off all potential ingress points for cold air, you significantly minimize the possibility of costly, time-consuming winter damage. It is our earnest hope that these insights shared have equipped you with the necessary understanding and acumen required to winterize your plumbing system effectively. Now, as winter approaches, may your home stand like a bastion against the cold, ensuring you warm, worry-free months ahead.